

Next.js: 6 Simple Steps to Set Up Google Analytics Tracking

Setting up Google Analytics in Next.js can be a little tricky. And this is because like many other SPA or static sites when you navigate to a new page, you are not actually going to a new page. What is actually happening is it loads the content for the new page in and becomes the current page.
Next.js calls this concept client side navigation. And because we are performing client side navigation, google analytics needs to be explicitly told about navigation changes.
If you have already attempted to set up Google Analytics in your Next.js site but it is only showing on direct navigation or when you explicitly refresh. The steps below will fix your issue and get you fully up and running with Google Analytics.
I found this example on GitHub Next.js sample with analytics but found it hard to follow, so here is a step-by-step guide to getting Google Analytics working in your Next.js app.
Step One: Have your Google Analytics account setup
I am going to assume you have already set up your Google Analytics account and added your project into it. You can find a guide put together by Google here: Get started with Analytics.
Step Two: Accessing your Google Analytics tracking code
Up next we will need to get the tracking code for your website.
In the Google Analytics Admin Panel found by pressing the Cog in the bottom left. Look for the Tracking Info section in the middle column. You will then click Tracking Code. This takes us to a page showing us our Tracking ID. Mine looks something like UA-123456789-1.
You'll need to copy your as we will use it in the next step.
Step Three: Custom _document.js page
Inside our pages folder, if you have not already created a _document.js, create on now. The _document.js is an important file in Next.js. It's used when we want to augment the htm>, head, or body tags for ALL of our pages in Next.js. You can find more on the _document.js file here: Advanced Features: Custom 'Document'.
Here is what your _document.js should look like (don't forget to replace the two UA-XXXXXXXXXXX with your own tracking code from Step 2):
1// /pages/_document.js
2import Document, { Html, Head, Main, NextScript } from 'next/document'
3
4import { GA_TRACKING_ID } from '../lib/gtag'
5
6export default class MyDocument extends Document {
7  render() {
8    return (
9      <Html>
10        <Head>
11          {/* Global Site Tag (gtag.js) - Google Analytics */}
12          <script
13            async
14            src={`https://www.googletagmanager.com/gtag/js?id=UA-XXXXXXXXXXX`}
15          />
16          <script
17            dangerouslySetInnerHTML={{
18              __html: `
19            window.dataLayer = window.dataLayer || [];
20            function gtag(){dataLayer.push(arguments);}
21            gtag('js', new Date());
22            gtag('config', 'UA-XXXXXXXXXXX', {
23              page_path: window.location.pathname,
24            });
25          `,
26            }}
27          />
28        </Head>
29        <body>
30          <Main />
31          <NextScript />
32        </body>
33      </Html>
34    )
35  }
36}
With just this above code your app will report to Google analytics, BUT it will only report the first direct page that a user views or when a user initiates a refresh of the page. Not super useful, as we won't get any information for when users navigate around our app. We'll cover that next.
Step Four: Creating Google Analytics event lib
We need to create a library named gtag.js that will be our service for sending page navigations to Google analytics. So in the lib folder create gtag.js and paste in the below code. Again, don't forget to replace the once occurrence of UA-XXXXXXXXXX and make sure you keep it as a string.
1// lib/gtag.js
2// https://developers.google.com/analytics/devguides/collection/gtagjs/pages
3export const pageview = (url) => {
4  window.gtag('config', 'UA-XXXXXXXXXX', {
5    page_path: url,
6  })
7}
8
9// https://developers.google.com/analytics/devguides/collection/gtagjs/events
10export const event = ({ action, category, label, value }) => {
11  window.gtag('event', action, {
12    event_category: category,
13    event_label: label,
14    value: value,
15  })
16}
Step Five: Call our pageView method when the route changes in our app
The last step is changing our _app.js file to call the gtag.pageview() method when the route changes (when a user navigates to a new page).
1//pages/_app.js
2import { useEffect } from 'react'
3import { useRouter } from 'next/router'
4import * as gtag from '../lib/gtag'
5
6export default function App({ Component, pageProps }) {
7  const router = useRouter()
8  useEffect(() => {
9    const handleRouteChange = (url) => {
10      gtag.pageview(url)
11    }
12    router.events.on('routeChangeComplete', handleRouteChange)
13    return () => {
14      router.events.off('routeChangeComplete', handleRouteChange)
15    }
16  }, [router.events])
17
18  return <Component {...pageProps} />
19}
The above code sends out a pageView event to Google analytics whenever a user changes pages. We now have Google analytics working!
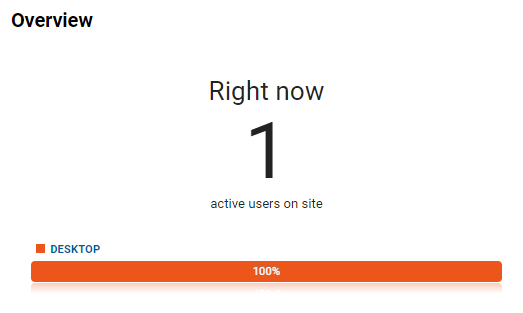
Step Six: Verify Google analytics is working.
Just a last step to verify our work. Start your dev build of your Next.js app, then head over to Google analytics. In the Realtime section of Google analytics you should see 1 active user, yourself, as you go to your site (This should work even in localhost:3000). Navigate around your app and see Google report the new active pages.
It's working now you can use analytics to improve your app!
Again, this post is based on the following GitHub repo example: Next.js sample with analytics. Check out the repo if you want to see the full source code.
If you run into trouble reach out on Twitter: @ThomasJDesmond